
Site & Device Management
On this page
What Site & Device Management Does
GCXONE organizes all managed objects in a five-level hierarchy. Every configuration, access control, and alarm routing decision operates within this structure.
- Service Provider (Tenant) — Root logic: global fleet operations, macro SLA reporting, multi-site roles.
- Customer (Organization) — Discrete client groups with segmented dashboards and billing.
- Site (Physical Location) — Tangible geo-fences with incident mapping and local operators.
- Device (NVR / Bridge / AI Box) — Connectivity boundary with streaming config and device health.
- Sensor (Camera / Detector) — Finest data granularity — individual rule application vector.
💡 TIP — Cascading Subscriptions: Subscribe the parent Customer to HealthCheck, and every subsequently onboarded Site/Device automatically subscribes downward — no admin intervention needed for new hardware.
Why It Matters
Site & Device Management is the foundation of everything in GCXONE. Without correctly structured sites and devices, alarm routing, access control, and health monitoring cannot function.
How It Works
Service Provider Settings
Navigate to Settings → General.
- Organization Name & Logo — Appears in reports and customer-facing views.
- Regional Locale & Timezone — Default for all Customers unless overridden.
- SOC Contact Variables — Email/phone injected into automated alert templates.
- Alarm Receiver Configuration — Primary DC09 or Talos connection (applies tenant-wide).
Managing Customers
Navigate to Configuration → Customers.
Creating a Customer:
- Click + Add Customer.
- Enter the customer's name, region, and contact details.
- Assign a default timezone.
- Enable HealthCheck at this level to cascade to all sites automatically.
- Save.
BulkImport Customers
For 100+ entities, use the BulkImport Marketplace feature (Excel-based upload).
Navigation: Configuration → Customers → Import → Download Template Required columns: customer_name, region, timezone.

Customer matrix import detailing required vs. optional fields.
Managing Sites
Site List — Address & Company Details
The Site List displays additional context for each site at a glance:
- Address column — hover over it to reveal Country, City, Street Name, and Postal Code in a compact tooltip.
- Company Name — displayed as a dedicated column, making it easier to scan and identify sites by the owning company.

Creating a Site:
- Click + Add Site.
- Assign to the correct Customer.
- Enter the site Name and Address — the address is geocoded for map display.
- Set the DC09 Account ID if using DC-09 alarm routing.
- Optionally assign the site to a map overlay (floor plan or satellite).
- Save.
BulkImport Sites

Deleting a Site
Go to Configuration → Sites, open the Actions menu (•••) for the site, and select Delete. This action is permanent and cannot be undone. If a site has schedules attached, deletion includes a confirmation step for the related schedule cleanup. If the site cannot be deleted, GCXONE displays a message describing why.
Moving a Site to Another Customer
GCXONE supports moving a site from one customer to another. Devices and sensors remain connected to the site after the move.
Map Overlays
- Satellite View — Uses the site's geocoordinates. Camera pins are placed on the satellite map. Operators can click a pin to open the camera stream directly.
- Floor Plan Overlay — Upload a custom floor plan image. Drag and drop sensor pins onto the floor plan. Useful for large indoor sites.
Navigation: Configuration → [Site] → Map Tab
Managing Devices
Navigate to Configuration → Devices.
Registering a Device:
- Click + Add Device.
- Select Device Type (Hikvision NVR, Dahua NVR, Cloud VMS, AI Box, etc.).
- Enter connection credentials: for on-premise NVRs enter IP address, RTSP port, admin username/password; for cloud VMS follow the OAuth or API token flow.
- Assign to the correct Site.
- Save — GCXONE initiates connection. Status updates to Online within 60 seconds if connectivity is successful.
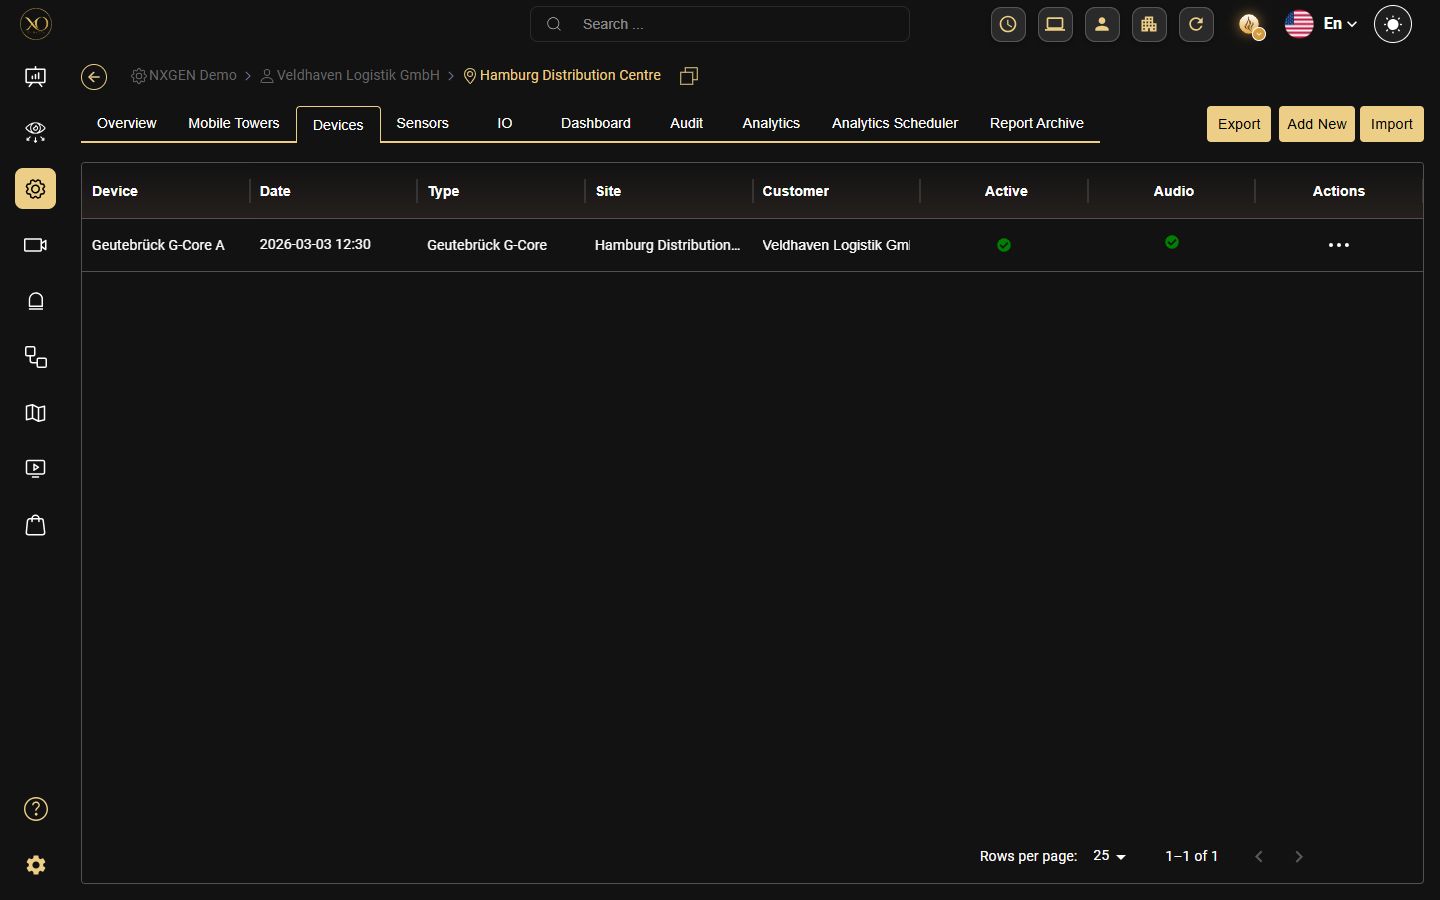
Filtering and Arranging Table Columns
Hover over a column header in the Devices table and click the menu icon (⋮) to open the column menu, which offers Show Filters, Hide column, and Manage columns.
Show Filters opens a filter with a Condition — Contains, Equal To, or Not Equal To — and a value field. Click Apply to filter the table, or Cancel to close the filter.
The Sensors and Mobile Towers tables have the same column menu.
Copying Device Identifiers
The device Overview page displays a Unique Reference Number, Serial Number, and IP Address. A copy icon next to each field copies its value directly to the clipboard — useful for troubleshooting, support requests, and network configuration.

Moving a Device to Another Site
If a device has schedules attached, moving it to a different site includes a confirmation step for the related schedule cleanup.
BulkImport Devices

Arranging a Device's Sensor Order
Step 1: Navigate to Configuration → Devices and select a device to open its Overview page.

Step 2: Click the device's Sensors tab. This is distinct from the tenant-wide Sensors table below — it lists only that device's own sensors, with Export, Add New, Import, and Arrange Order actions.

Step 3: Click Arrange Order to open the Arrange sensor order dialog, which lists every sensor with a drag handle. Drag a sensor by its handle to move it to a new position in the list, then click Save. This order also determines how the device's sensors appear in the Video Viewer's Device Explorer panel.

Managing Sensors
Navigate to Configuration → Sensors.

The Sensors table lists every sensor across the tenant, with its reference number, device, site, device type, manufacturer, and audio/active status.
Editing a Sensor
Open the Actions menu (•••) for a sensor and select Edit to open the Edit Sensor dialog, which has three tabs: Edit (name, type, coordinates, connection details), Properties, and Associate sensor.
When the sensor Type is camera, the Edit tab also shows the PTZ, Thermal, Audio, and 360 toggles.

Associating a Sensor with Another Customer or Site
The Associate sensor tab lets you attach the same sensor to a different customer or site in the hierarchy tree, instead of duplicating it as a separate device — useful for a shared or virtual sensor that multiple customers need to see. A Keep Camera Association toggle controls whether the sensor's original association is preserved when you add the new one.

Sensor Unique Reference Number (URN)
The sensor URN is now accessible directly in the UI and export.
- URN visible as a read-only field in the sensor detail view, with a one-click copy icon.
- URN available as an optional column in the sensor list (hidden by default, toggle via Manage columns in the column menu).
- URN included in all CSV and Excel exports as a "Unique Reference Number" column.


Device Status Reference
Status | Meaning |
|---|---|
Online | Device is connected and streaming. No action required. |
Offline | GCXONE cannot reach the device. Check network path; verify credentials. |
Degraded | Device connected but stream quality is poor. Check bandwidth; review NVR resource usage. |
Maintenance | Admin has set device to maintenance mode. Restore Active state when work is complete. |
Events Log — Device Dashboard
An Events Log panel is available on the device dashboard, giving admins direct visibility into alarm activity on a per-device level.
The panel lists each event with the following fields: Time, Event Type (e.g. motion.event), Genesis Analysis (Real / Blocked classification), Zone, Camera Name, Index, Alarm/Restore, Device Type, Camera Type, and duration metrics — Images Duration, Analytics Duration, and Overall Duration.

Device Health History
A Device Health History panel is available on the device dashboard, showing time-series health metrics for each device. The panel displays:
- Time — timestamp for each recorded health check.
- State — the health state at that point in time.
- Active Cameras — number of active cameras at the time.
- Time Difference — time since last health check.
- Disk Free — available disk space on the device.
- Disk Count — total disk count.
- FW Version — firmware version running on the device.
- FW Last Update — date of last firmware update.
- Last Alarm Received — timestamp of the most recent alarm received.

Active vs. Report Events Controls
Each device has two toggles controlling its operational behavior:
- Active — When disabled, the device is excluded from all alarm processing. Events from an inactive device are not forwarded to the CMS. Use during planned maintenance to prevent false alarm flooding.
- Report Events — When disabled, the device stays connected and visible in dashboards but its events are not processed. More granular than Active — useful when you want health monitoring to continue but alarm generation to pause.
Key Capabilities
Supported Device Integrations
NVR (On-Premise):
- Hikvision
- Dahua
- Hanwha Vision
- SenStar
Cloud VMS:
- Hik-ProConnect
- Eagle Eye Networks
- Milestone XProtect
- Axis Camera Station
- Dahua Cloud ARC
AI Box:
- Camect AI Box
IoT & Perimeter:
- AJAX Security
- SenStar Perimeter
BulkImport Engine
Managing 500+ site conversions manually guarantees human error. BulkImport operates as a deterministic ingestion pipeline.
- Payload Structuring — Export the .xlsx template. Map internal databases to the rigid column expectations.
- Pre-Flight Parsing — Upload to initiate the data verification script. It isolates unmapped relational data instantly (e.g. Device referencing a non-existent Site).
- Instantiation — Commit the payload. The database recursively generates Sites, associates Devices, and spins up connection threads simultaneously.
Real-World Use Cases
- A service provider onboards a new customer with 50 sites using BulkImport — completing in minutes instead of days.
- An operator notices a device status has changed to Degraded and immediately contacts the site technician to check bandwidth.
- An admin sets Report Events = Off on a device before a scheduled firmware update, preventing false alarm flooding during the maintenance window.
- A guard role is assigned site-level access only — cascading inheritance ensures they cannot view devices outside their assigned site.
Best Practices
- Always enable HealthCheck at the Customer level so new sites inherit it automatically.
- Use BulkImport for any onboarding involving more than 10 entities to avoid human error.
- Before any physical maintenance on a device, set Report Events = Off rather than fully deactivating it — this keeps health monitoring running.
- Always assign the correct timezone at the Customer level before creating sites beneath it.
- Use Floor Plan Overlays for large indoor sites to make camera positioning immediately clear to operators.
Thank you — your feedback goes to the team that owns this page.